How to Store Documents in QuickBooks Desktop for Your Practice

Accounting can generate a lot of paper. QuickBooks provides tools that can help you manage digital versions.
Managing your practice’s accounting can generate a lot of paperwork. QuickBooks offers tools that help you efficiently manage digital versions of these documents, making your workflow smoother and reducing clutter in your office.
Even in today’s digital world, many practices still deal with piles of paper documents—receipts, contracts, bills, and more. Finding an organized way to store and quickly access these documents can be challenging. QuickBooks solves this issue through its Doc Center, where you can store digital files in a central location and even attach them directly to specific records and transactions. Here’s how to use these features effectively.
Using the Doc Center
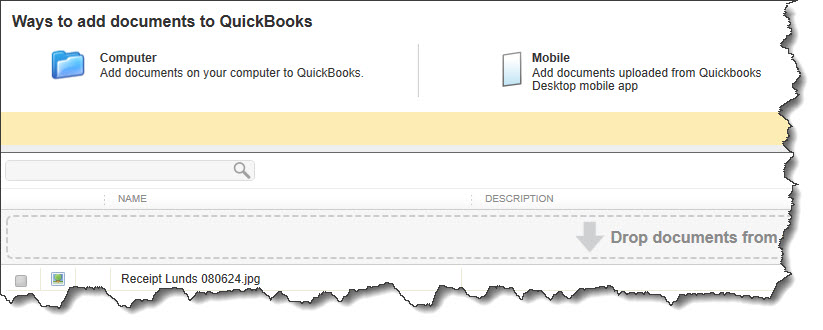
QuickBooks’ Doc Center simplifies the process of uploading and managing documents within the software. This central storage space allows you to:
- Upload files from your computer or other storage devices.
- Enter keywords, descriptions, and other details to make files easier to find.
- Open and manage files within the Doc Center.
To get started, click on "Docs" in the toolbar. This opens the Doc Center. Click "Add document" in the upper left corner, and QuickBooks will open your file directory. Select the desired file to move it into the Doc Center. You can also drag and drop documents from your desktop or from Microsoft Outlook. Once uploaded, you can enter additional details such as titles and keywords to help organize your documents.

Uploading Receipts
If you encounter issues uploading receipts in formats like.jpg or .png, you may need to adjust Windows’ default app settings. To do this, minimize QuickBooks and type “default apps” in the Windows search box. Click "Choose default apps by file type" and adjust the settings for your file types (e.g., JPEG) to ensure they display correctly in QuickBooks. This simple adjustment allows you to store all types of receipt formats in the Doc Center.

Attaching Files to Transactions
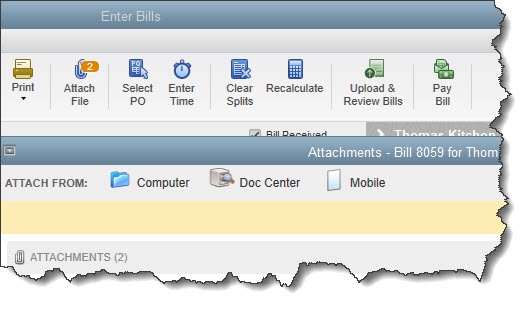
While the Doc Center is useful for general storage, QuickBooks also allows you to attach files directly to transactions. For example, when entering a bill, you can attach related invoices by clicking "Attach File" in the toolbar. Choose a file from your computer or the Doc Center, and the attachment will be linked to the transaction. This feature helps keep your records comprehensive and ensures that all relevant documents are easily accessible when reviewing specific transactions.

Uploading From the QuickBooks Mobile App
QuickBooks Desktop’s mobile app enables you to snap photos of receipts, bills, and other documents and upload them directly to your company file. You can access uploaded receipts under "Vendors | Receipt Management," bills under "Vendors | Upload & Review Bills, "and other documents in the Doc Center by clicking "Add document from mobile."
Keep It Local
While there are many options for cloud storage, keeping your accounting-related documents within QuickBooks ensures they are integrated with your financial records. The process of storing documents in QuickBooks is straightforward, but if you encounter challenges, support is available to help streamline your document management process.


